Integrating apps into your forms to add more functionality is a time taking task. But with Zapier, it is not. It lets you automate your workflow and save time. Zapier in Pie Forms lets you connect popular apps to your forms and improve your work efficiency.
If you are new to Pie Forms, you may want to look at How to create your first Form with Pie Forms.
This tutorial will show you how to install, activate, and use the Zapier Add-on with Pie Forms to automate your work.
Note: Before starting, ensure your site has a secure connection with an updated SSL certificate installed. Check out these for SSL certificate checks and fixes.
How to Install and Activate the Add-on
Log in to your Genetech Store Account and download the plugin file to install the add-on.
- Go to WordPress Admin Dashboard > Plugins > Add New
- Upload the zip file of the Addon.

The plugin will now be visible in the list of plugins.
- If you are using Pie Forms Premium, you only have to activate the addon. The license key is not required.
- To activate the plugin, go to the list of inactive plugins.
- Locate “Pie Forms (Addon) – Zapier” and click on the ‘Activate’ button.

If you are using Pie Forms Basic, Upgrade to PRO or buy the addon separately.
- To activate the license key, go to Genetech store account > My account > My Keys.
- Copy the key.
- Go to your WordPress Admin dashboard, and click on Pie Forms.
- Then, Pie Forms > Global Settings > License Key
- Paste the email address and license key and click Activate.
Zapier addon is now installed and activated.
Once the Zapier addon is activated, go to Pie Forms >> Global Settings and click on the Integrations tab.

You’ll find the API keys to integrate Zapier with your website here.
Create A Zap In Zapier
The next step is to create a zap that sends information from your forms to another application.
For this, you’ll need to log in to your Zapier account. If you don’t have one yet, sign up for free here.
After you’ve logged in to your account, click the Create Zap button in the upper left corner. This will open the setup page for a new zap. Name your Zap by adding a title in the upper left corner of the page.

Set Up Your Trigger Event
Next, select Pie Forms as your trigger app from the App Event search box. Select Pie Forms, and Zapier will display your trigger options under Trigger Event. Select the trigger option from the dropdown, then click the Continue button to proceed.

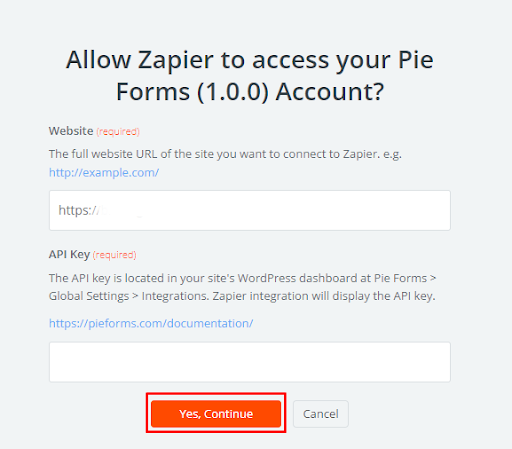
Next, connect Zapier to Pie Forms on your website. To do this, click the Sign in to Pie Forms button.
Now you will need to add your website URL and API Key. Find your API key from the integrations in the global settings. Copy and paste the Zapier API key into the zap setup page.

Click Continue.
Next, select the form you’d like to use from the dropdown and click Continue again.

Now test your trigger.

Click the Test Trigger button to load available entries. Zapier will then show you the entries pulled from your form. You can select any entry from the dropdown to view and ensure everything works correctly.

Click Continue.
Note: The form must have at least one entry for the test to work.
Set Up Your Action Event
Next, select an App Event for the action you want to take in response to the trigger. This app is the service you want to send your form entry details. After selecting an app, choose an action you want to happen when a new form entry is submitted.

After selecting an app, there are steps to send form data to your chosen service. These steps will depend on which service you integrate your forms with.
Popular Integrations of Zapier Connections with Pie Forms
- Upload Files To Web Storage Services
- Create a task list or team communication
- Create a contact list
- Schedule Events
- Create a ticket for support queries
- Add new customers as your subscribers
- Keep your team in the loop with new leads
That’s it! You can now connect your forms to various web services through the Zapier addon in Pie Forms.


